Hi! As usual, I have grown frustrated with my current makeup storage situation and am in the process of reorganizing and rearranging. As my kit grows and I work on more and more photoshoots, etc., I have really learned why downsizing and consolidation are so important! Lugging tons of packaging around SUCKS, not to mention it takes longer to find the colors you need.
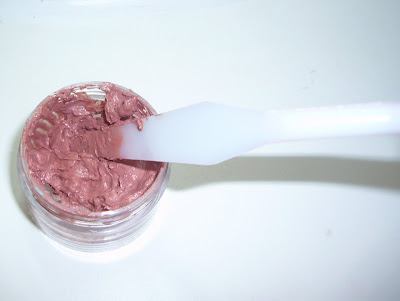
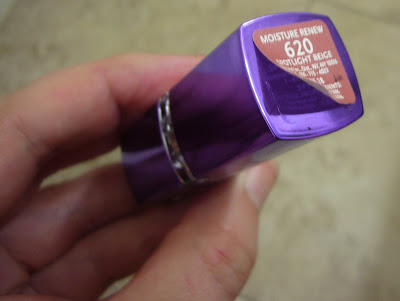
Anyways, I took on a major project today after watching several YouTube tutorials: I depotted 30 of my lipsticks! I had been wanting to do it for a while now, but was fearful of altering the formulation/finish/pigmentation of the lipsticks. While it was definitely a messy and tedious task, it came out as good as I imagined, which is as much as I can ask for!
And of course, I documented the whole process so I could share it with you all!
SUPPLIES
*After going through all this and seeing how messy it could be, some other items you may find helpful in the process:
--rubber gloves (your fingertips will be stained pink for a while otherwise, lol)
--apron, smock, or "hair-dye" clothes (you WILL get messy)
--plastic bag (cover your blow dryer everywhere except openings, or else it will be tie-dyed like mine turned out...cleaning it will be so fun)
--placemat (surface of wherever you are working)
--Exacto knife or metal spatula (sturdier than my plastic one)
--chopstick (mash that lipstick easier!)
1. Sanitize everything--spatula, jar, lipstick, and your hands to make sure no bacteria gets caught up in the process.
2. Set your hair dryer to "Warm" and "Low" when in use; anything more will be too much.
3. If you want to use the label that is already on the lipstick, apply some heat to it for about 10-15 seconds to loosen the adhesive.
4. Gently peel the label up, trying to crease it as little as possible.
5. With your lipstick mostly turned down in the tube, apply some heat to the body of the packaging (NOT where your hand turns it up) to soften the base of the lipstick. This way, you can get so much more product out without having to scoop. Depending on the brand and finish of the lipstick, you still may have to scoop, but at least it will be minimal if you don't skip this.

6. Gently wiggle (if necessary) and lift the lipstick out of the tube.

7. Scoop out whatever product is left in the base, if necessary, with your spatula and place in the jar.

8. Using your spatula again, mash up the lipstick so that it coats the bottom of the jar in as even a layer as possible.

9. If you haven't already done so, place the label onto the bottom of the jar.

10. If the label is dirty/faded, simply make a new one using round sticker labels (check out Walmart or office supply stores). Try to include as much info as you can fit. I stick to brand and shade; you can always Google which line it was from later if you need to replace it!


11. Apply the label to the bottom of the jar. This is especially awesome with the stackable jars because even if you switch up the order, the shade is always easily identified.

12. Repeat the previous steps for all of your shades, or as many as you want to do for now. I found that it was faster to do each step for all of the lipsticks as a group rather than start to finish individually.
13. Place the jars in a shoebox, removable plastic drawer, or anything around the house with walls. This helps to prevent cleanup, as splatter is sure to occur. Also, this will prevent lipstick from getting onto you, your clothing, and the surfaces around you. Be sure to do the rest of the steps in a place that is easy to clean and won't get stained.

14. Concentrating on one shade at a time, apply heat until they start to liquify a bit. The longer you do it, the more flat and store-bought they will look. The closer to the jar you get, the more splatter there will be. Some formulas/brands will take longer than others. Just be careful and be sure not to get it in your eyes or hair! If it does get on the counter or the hair dryer, wipe with a damp cloth or some rubbing alcohol.

15. Eventually, all of your colors will look relatively smooth and liquified. Set aside and let them dry completely before handling these bad boys...they're HOT. I don't advise microwaving, as a) color will splash everywhere and b) the plastic jar may melt, which would be a disaster.

17. Stack your jars together in color order based on shade and opacity. It should look something like this!

Here is what 25 of my lipsticks looked like while cooling (the other 5 were in the stack pictured above).

This is what all of my stacks look like once assembled. I got 6 stacks of 5 in a carrying case like this at Michaels in the bead storage section. It retailed for $8.99, but I had a 40% off coupon, bringing it to a measley $5.39 before tax. Even on sale, the stacks separately go for about $1.29, so this is definitely the better (and much more organized) option.


0 comments:
Post a Comment